

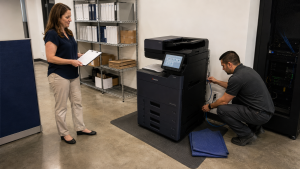
Planning guide for office managers and IT teams
A successful copier installation is not just a delivery. The right location, network details, scan destinations and decision-makers all need to come together. This office copier installation checklist helps your team prepare before the technician arrives, verify the setup and avoid preventable delays.
The five-minute readiness check
Before delivery: complete these six installation steps
Choose the final location
Allow room for paper trays, doors and finishing accessories to open. The device should be convenient for its users without blocking a hallway, emergency route or workspace.
- Measure doorways, elevators and turns along the delivery path.
- Clear boxes, furniture and floor hazards.
- Confirm ventilation and service access around the machine.
Verify power and network access
Confirm electrical requirements with the equipment provider. Avoid assuming an extension cord or shared power strip is appropriate. An active wired network connection is usually the most dependable foundation for a shared office copier.
- Identify the correct wall outlet.
- Have the network jack activated and tested.
- Ask IT whether a reserved or static IP address is required.
Document print requirements
List the Windows and macOS computers that need access, along with any specialized applications that generate print jobs. Note defaults such as black-and-white, duplex printing, secure print or specific paper trays.
Prepare scan destinations
Scanning often requires more coordination than printing. Decide whether employees will scan to email, a network folder, USB storage or a supported document platform. Your IT provider may need to supply mail-server settings, folder paths, credentials or security approvals.
Confirm users, codes and address books
If the office uses department codes, user authentication or scan address books, prepare a clean list before installation. This reduces manual entry and helps protect access to administrative functions.
Plan for the outgoing device
Know whether the old copier is being returned to a leasing company, removed by another vendor, moved within the building or retained temporarily. Back up any address-book information that the organization is authorized to keep, and follow the appropriate data-removal process before disposal or return.
Information to send your copier provider in advance
| Information | Why it matters | Who usually provides it |
|---|---|---|
| Office address, floor and delivery restrictions | Helps plan access, timing and equipment movement. | Office manager or facilities |
| Primary onsite contact and mobile number | Gives the delivery and installation team one decision-maker. | Office manager |
| Network settings and security requirements | Supports device connectivity, driver deployment and approved protocols. | Internal IT or managed IT provider |
| Scan destinations and address-book list | Allows real workflows to be configured and tested. | IT and department leads |
| Paper sizes, stocks and tray assignments | Ensures defaults reflect daily use. | Frequent users |
| Finishing and secure-print needs | Confirms stapling, sorting and controlled document release. | Department leads |
What to expect on installation day
The device and accessories are moved to the approved location.
Trays, finishers and other options are installed and checked.
Network, print, scan and user settings are applied.
Core workflows are tested with the customer contact.
Keep the onsite contact and an IT resource available during the agreed installation window. They do not need to stand beside the technician throughout the process, but quick answers can prevent a missing password, firewall rule or approval from stopping configuration.
Office contact
Confirms placement, paper defaults, users and business workflows.
IT contact
Provides approved network details, credentials and security decisions.
Equipment team
Installs, configures and tests the device and selected accessories.
Do not sign off until real workflows are tested
A practical acceptance test
- Print from a typical employee computer
- Print duplex and black-and-white defaults
- Copy a one-sided and two-sided original
- Scan to each approved destination
- Pull paper from every configured tray
- Test stapling or other selected finishing
- Confirm user codes or secure print
- Show staff how to request support
Testing should reflect everyday work. A successful configuration is not simply a device that powers on; it is a device that prints the accounting report correctly, scans a client packet to the right folder and gives authorized employees the functions they need.
Revisit the setup after the first week
Once employees have used the new copier under normal conditions, collect a short list of questions. Common adjustments include changing driver defaults, adding a scan destination, renaming address-book entries or clarifying which tray holds a special paper stock. Small refinements early can make the system easier to use for years.
Keep the model, equipment identification number and service contact in an accessible place. STAT customers can use our Customer Center for support resources and submit a copier service request when attention is needed.
Plan the equipment and the installation together
STAT Business Systems helps South Florida organizations compare current Kyocera equipment, choose practical copier leasing or purchase options, and prepare for professional delivery and setup. Tell us about your print volume, users, network and workflow so we can recommend an appropriate solution.
Request a free office equipment quoteQuestions? Call our Broward office at 954-321-1949.